Quickstart: run your first Testmode test
This quickstart takes you from a new account to your first test result. You create a project, write one test case in plain English, run it in a cloud browser and read what happened.
The example tests the Toolshop, a public practice shop at https://practicesoftwaretesting.com, so you can follow along without your own app. To test your own app instead, use its URL wherever the Toolshop’s appears.
Before you start
Section titled “Before you start”- A browser. There is nothing to install.
- A site to test. Use the Toolshop, or any web app reachable from the public internet. Testmode’s browsers run in the cloud, so they can’t open
localhostor sites behind a VPN. - Credits. Runs use your organization’s credits. The Run tests dialog shows the cost and your balance before anything starts.
Create your account
Section titled “Create your account”-
Open the Testmode app and select the Sign Up tab.
-
Enter your Name, Email and Password.
-
Click Create Account.
Testmode signs you in and takes you to setup.
Create your organization and first project
Section titled “Create your organization and first project”An organization holds your team, your projects and your credits. A project holds the tests for one app.
-
Under Create your organization, enter an Organization Name, such as
Pellbrook Digital, and click Continue. You become the organization’s Owner. -
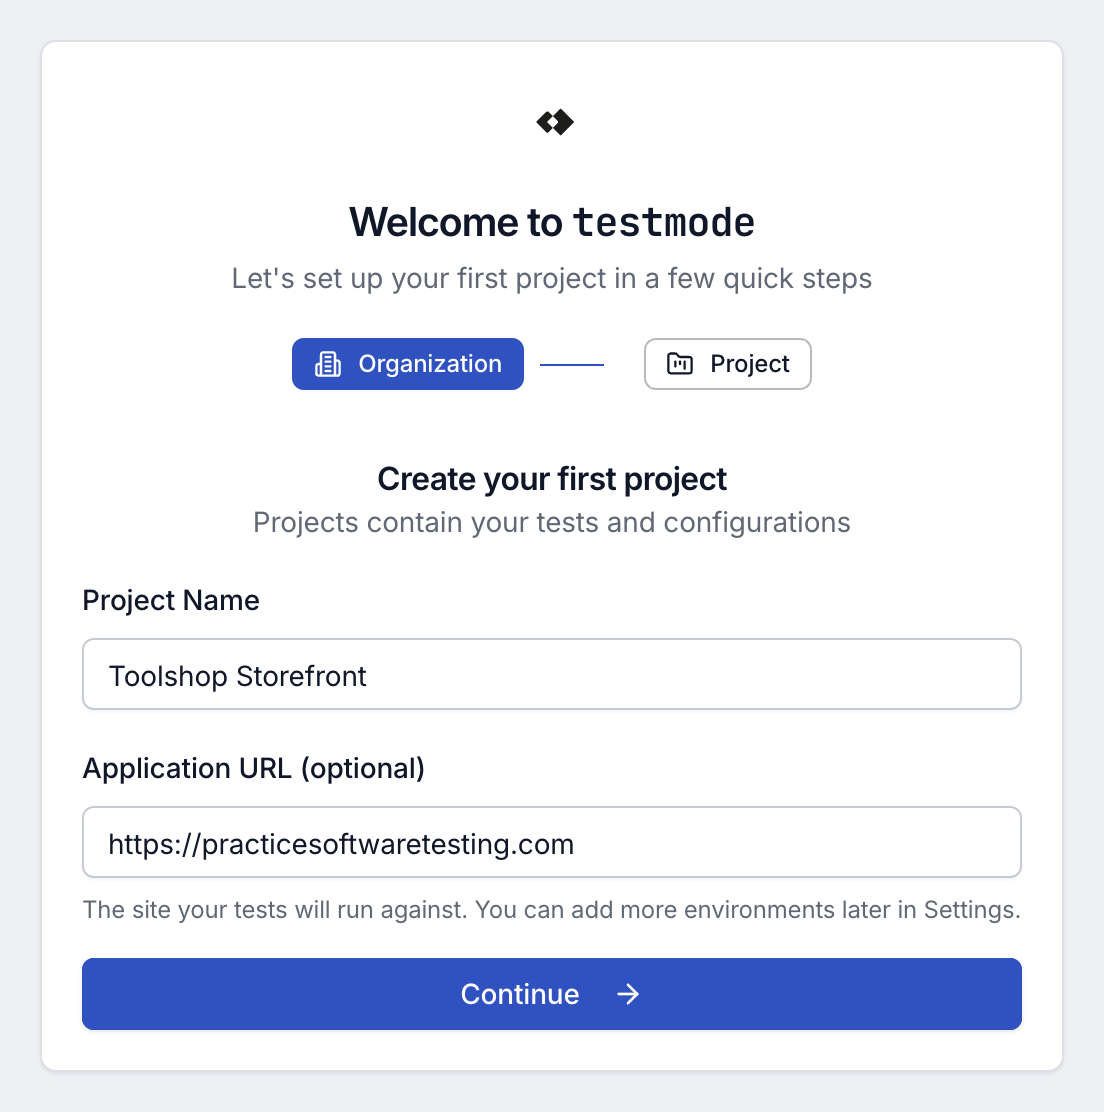
Under Create your first project, replace
My Appin Project Name with a name for your project, such asToolshop Storefront. -
In Application URL (optional), enter
https://practicesoftwaretesting.com. -
Click Continue.
Testmode creates the project and opens Overview.
Check the environment
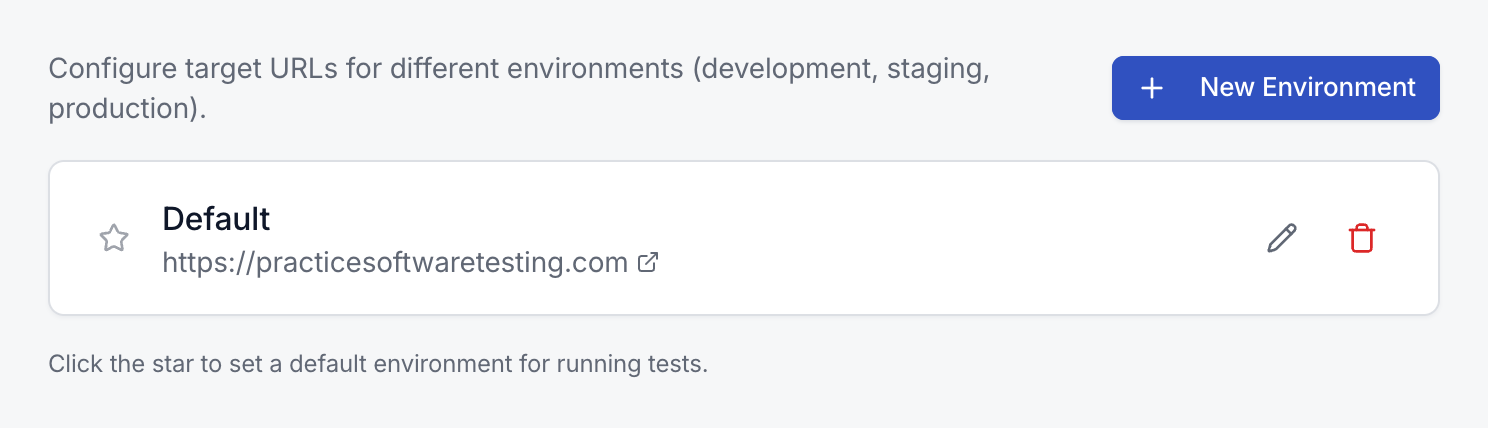
Section titled “Check the environment”An environment is a site your tests run against. The Application URL you entered became an environment named Default.
-
Open Settings > Environments.
-
Find
Defaultin the list.
Default points at the Toolshop, and it is not marked as production.
Write your first test case
Section titled “Write your first test case”A test case is a list of steps and an Expected Outcome, both in plain English. You describe what a person would do and see. You don’t write code or selectors.
-
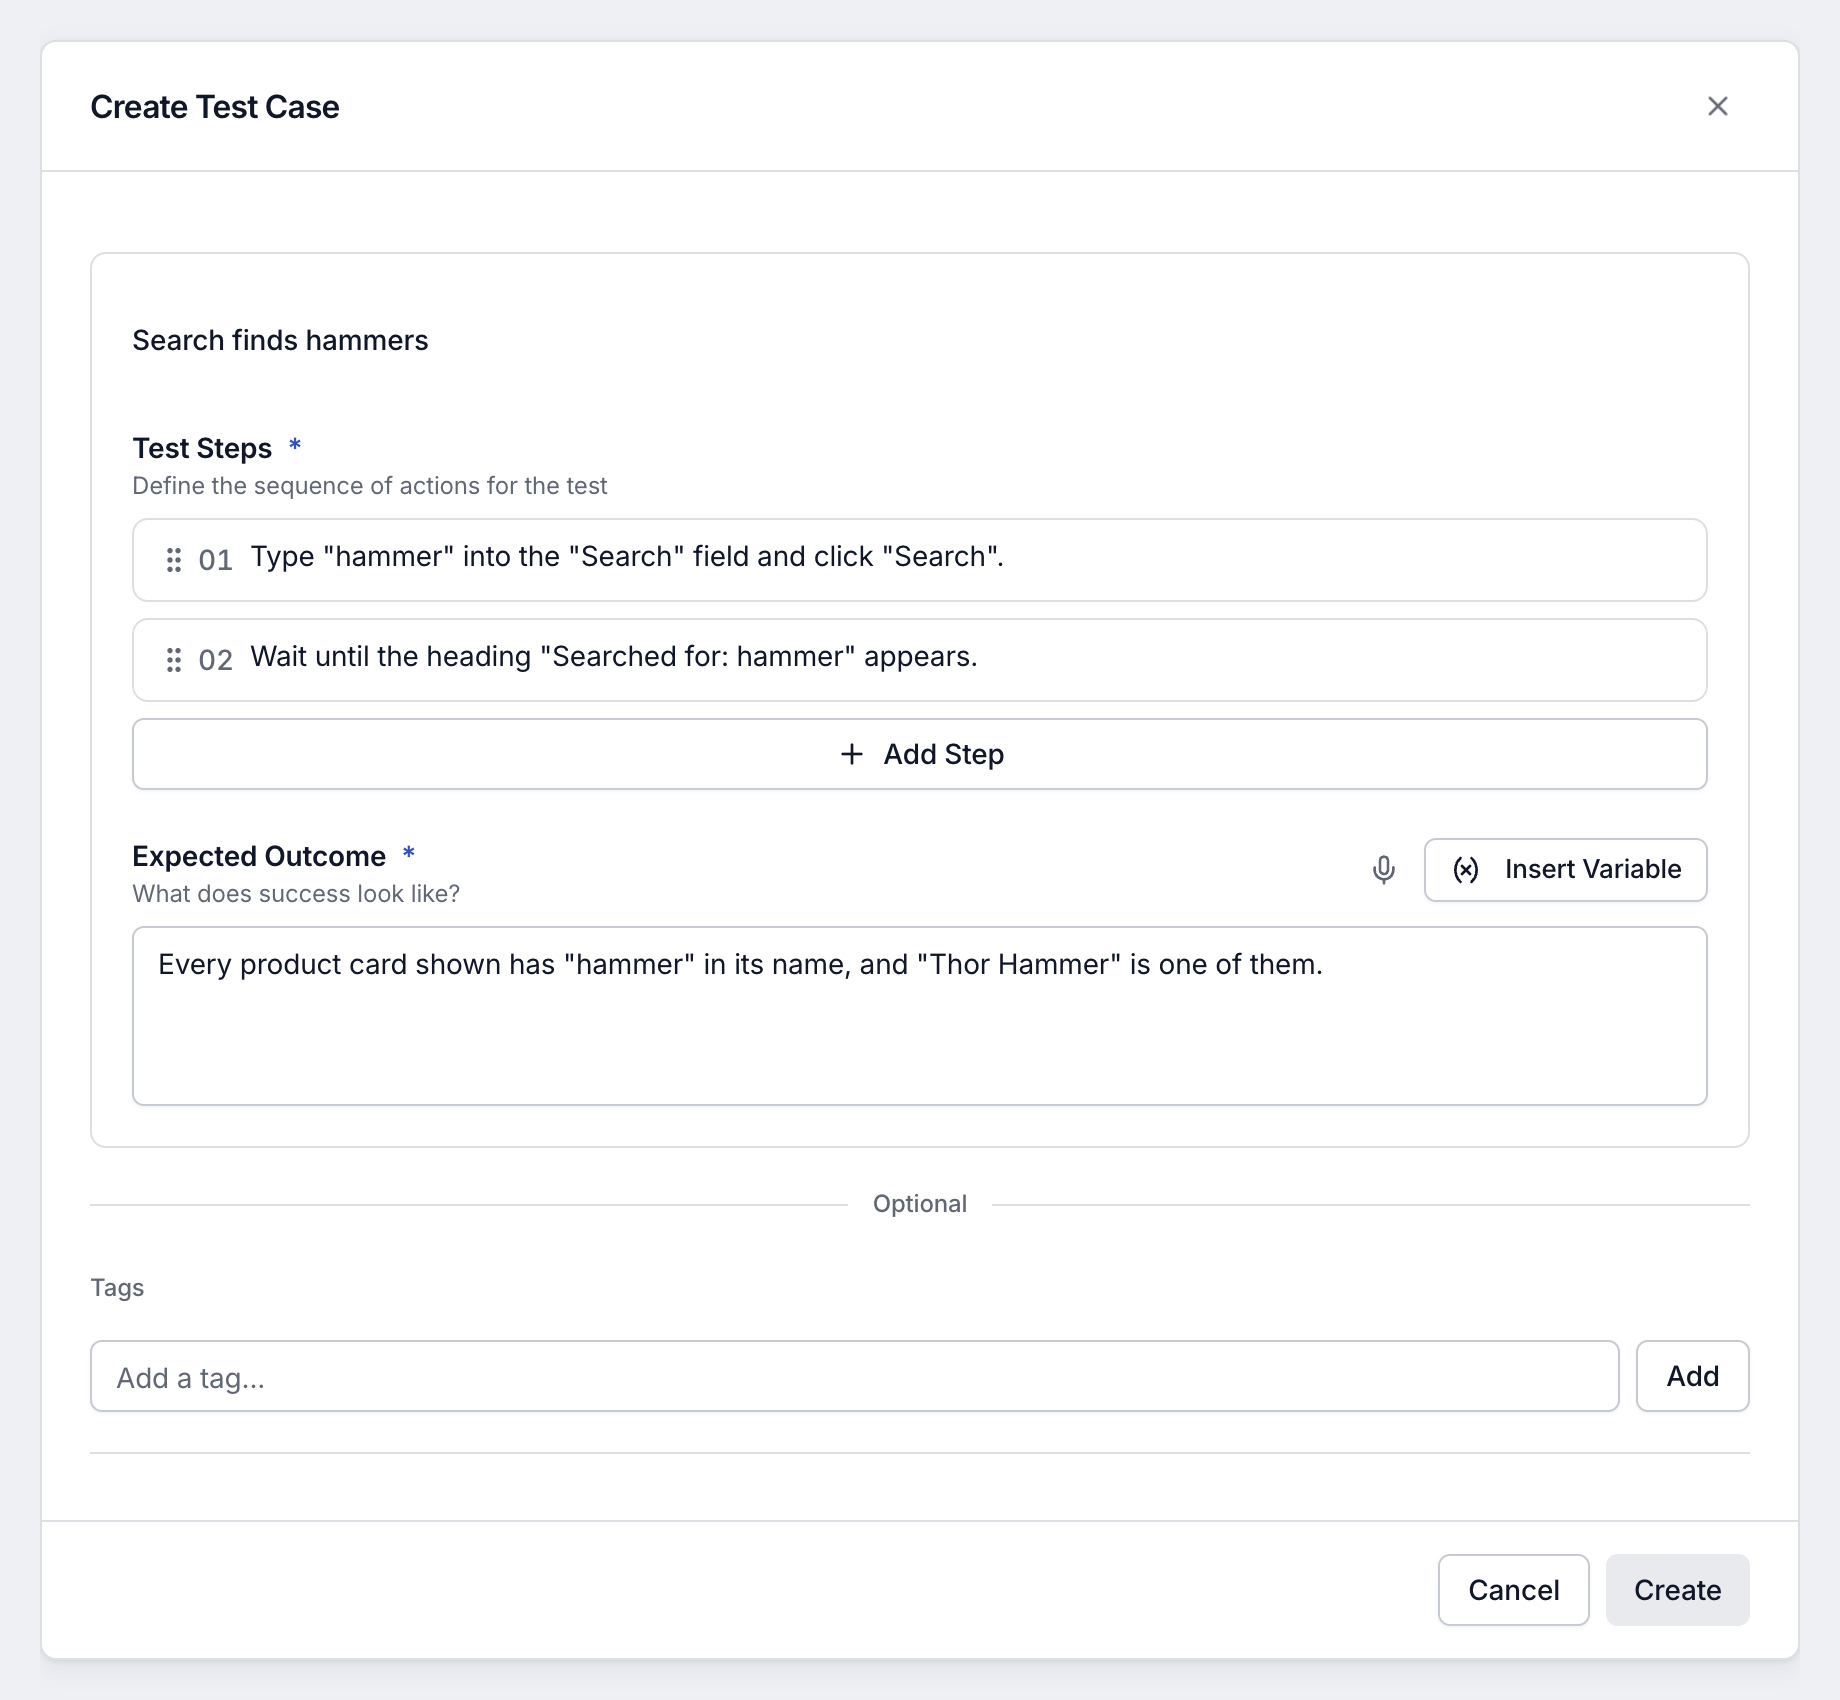
In the sidebar, click Test Cases, then click New Test Case. The Create Test Case dialog opens.
-
In the name field at the top, type
Search finds hammers. -
Click Add Step and type the first step. Click Add Step again for the second:
1. Type "hammer" into the "Search" field and click "Search".2. Wait until the heading "Searched for: hammer" appears. -
In Expected Outcome, describe what success looks like:
Every product card shown has "hammer" in its name, and "Thor Hammer" is one of them. -
Leave Start Path empty, so the test starts at the environment’s Base URL, the shop’s home page. Leave Maximum duration (minutes) empty too, so the test uses the project’s default time limit.
-
Click Create.
Create stays disabled until the test has a name, at least one step and an Expected Outcome.
Run it
Section titled “Run it”-
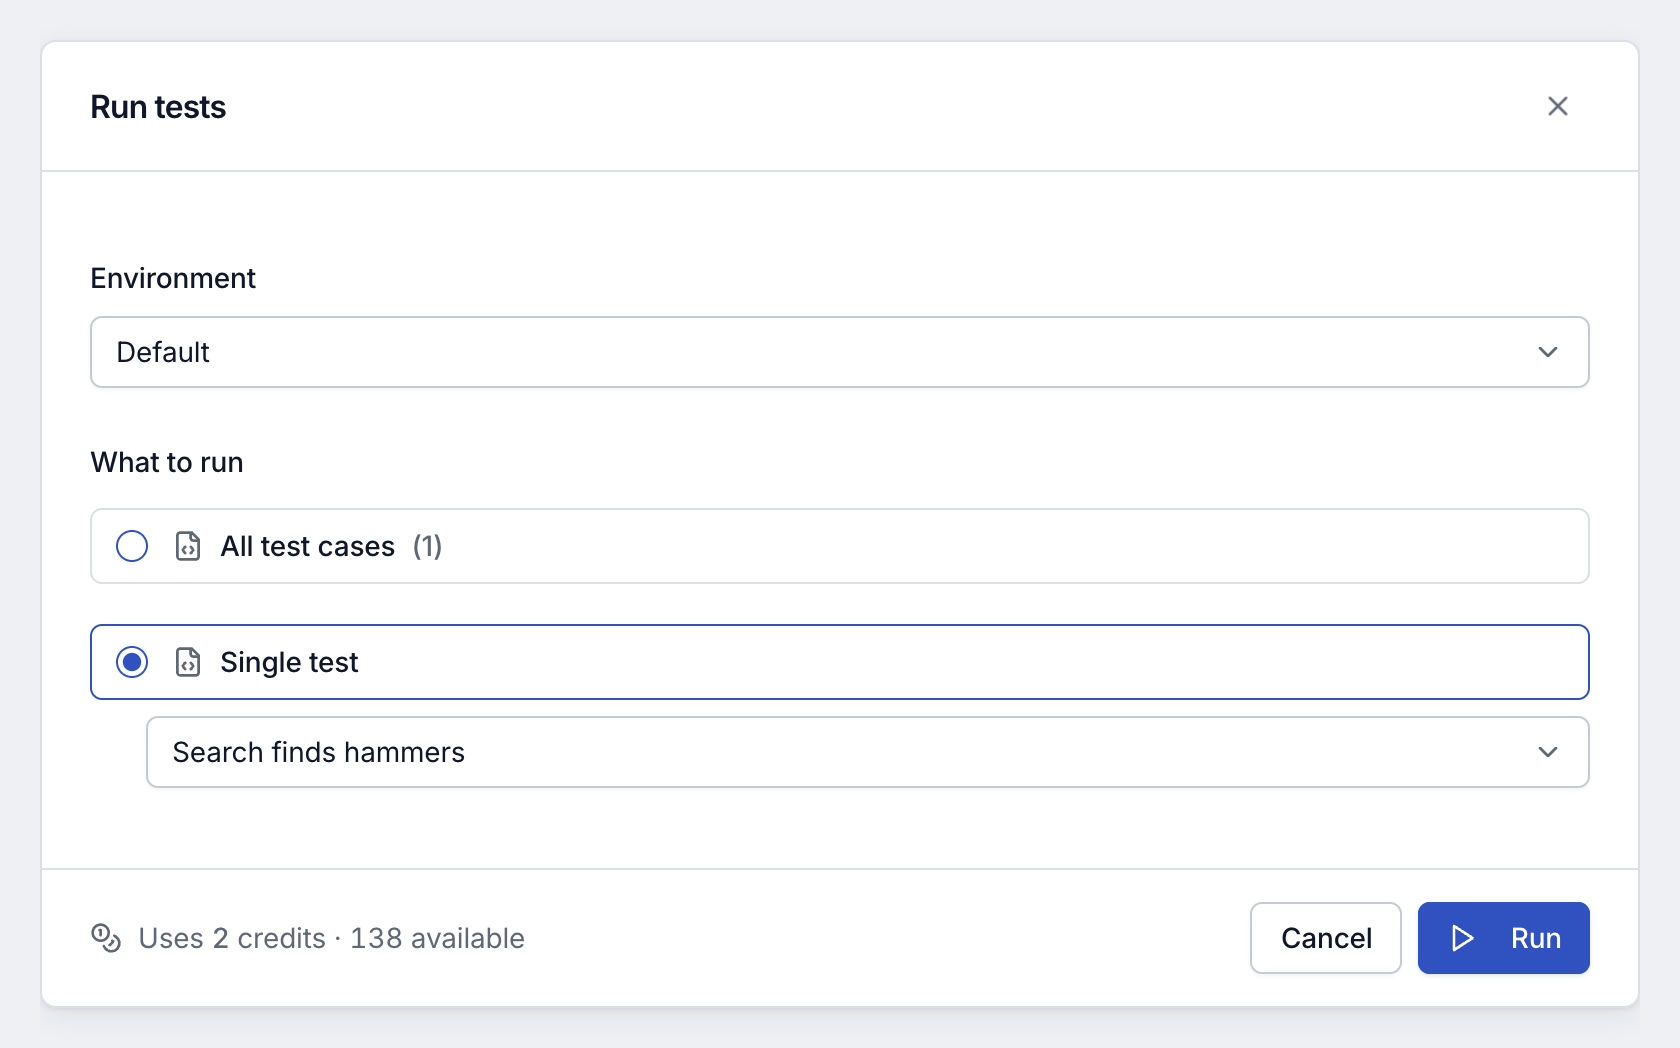
Click Run test in the header. The Run tests dialog opens.
-
Under Environment, choose
Default. -
Under What to run, choose Single test, then pick
Search finds hammers. -
Check the footer. For this test it reads “Uses 2 credits”, followed by the credits your organization has available.
-
Click Run.
A run uses one credit for each step in a test case, with a minimum of one credit per test case. This test has two steps, so it uses two credits.
Read the result
Section titled “Read the result”Testmode opens the run page. While the test waits for a browser and runs, the page shows In progress. When the test finishes, it shows Passed or Failed.
- While it waits, a line on the page says why, for example “Next in line for a browser”, or how many tests are ahead of yours.
- While it runs, the Live Browser View shows the browser as the agent works.
- When it passes, you see the verdict and a summary the agent wrote about what it found.
- Test Steps lists each browser action the agent took, with a screenshot and the reasoning behind it. The first action starts expanded; click any row to expand it. In the screenshot, the last action is open.
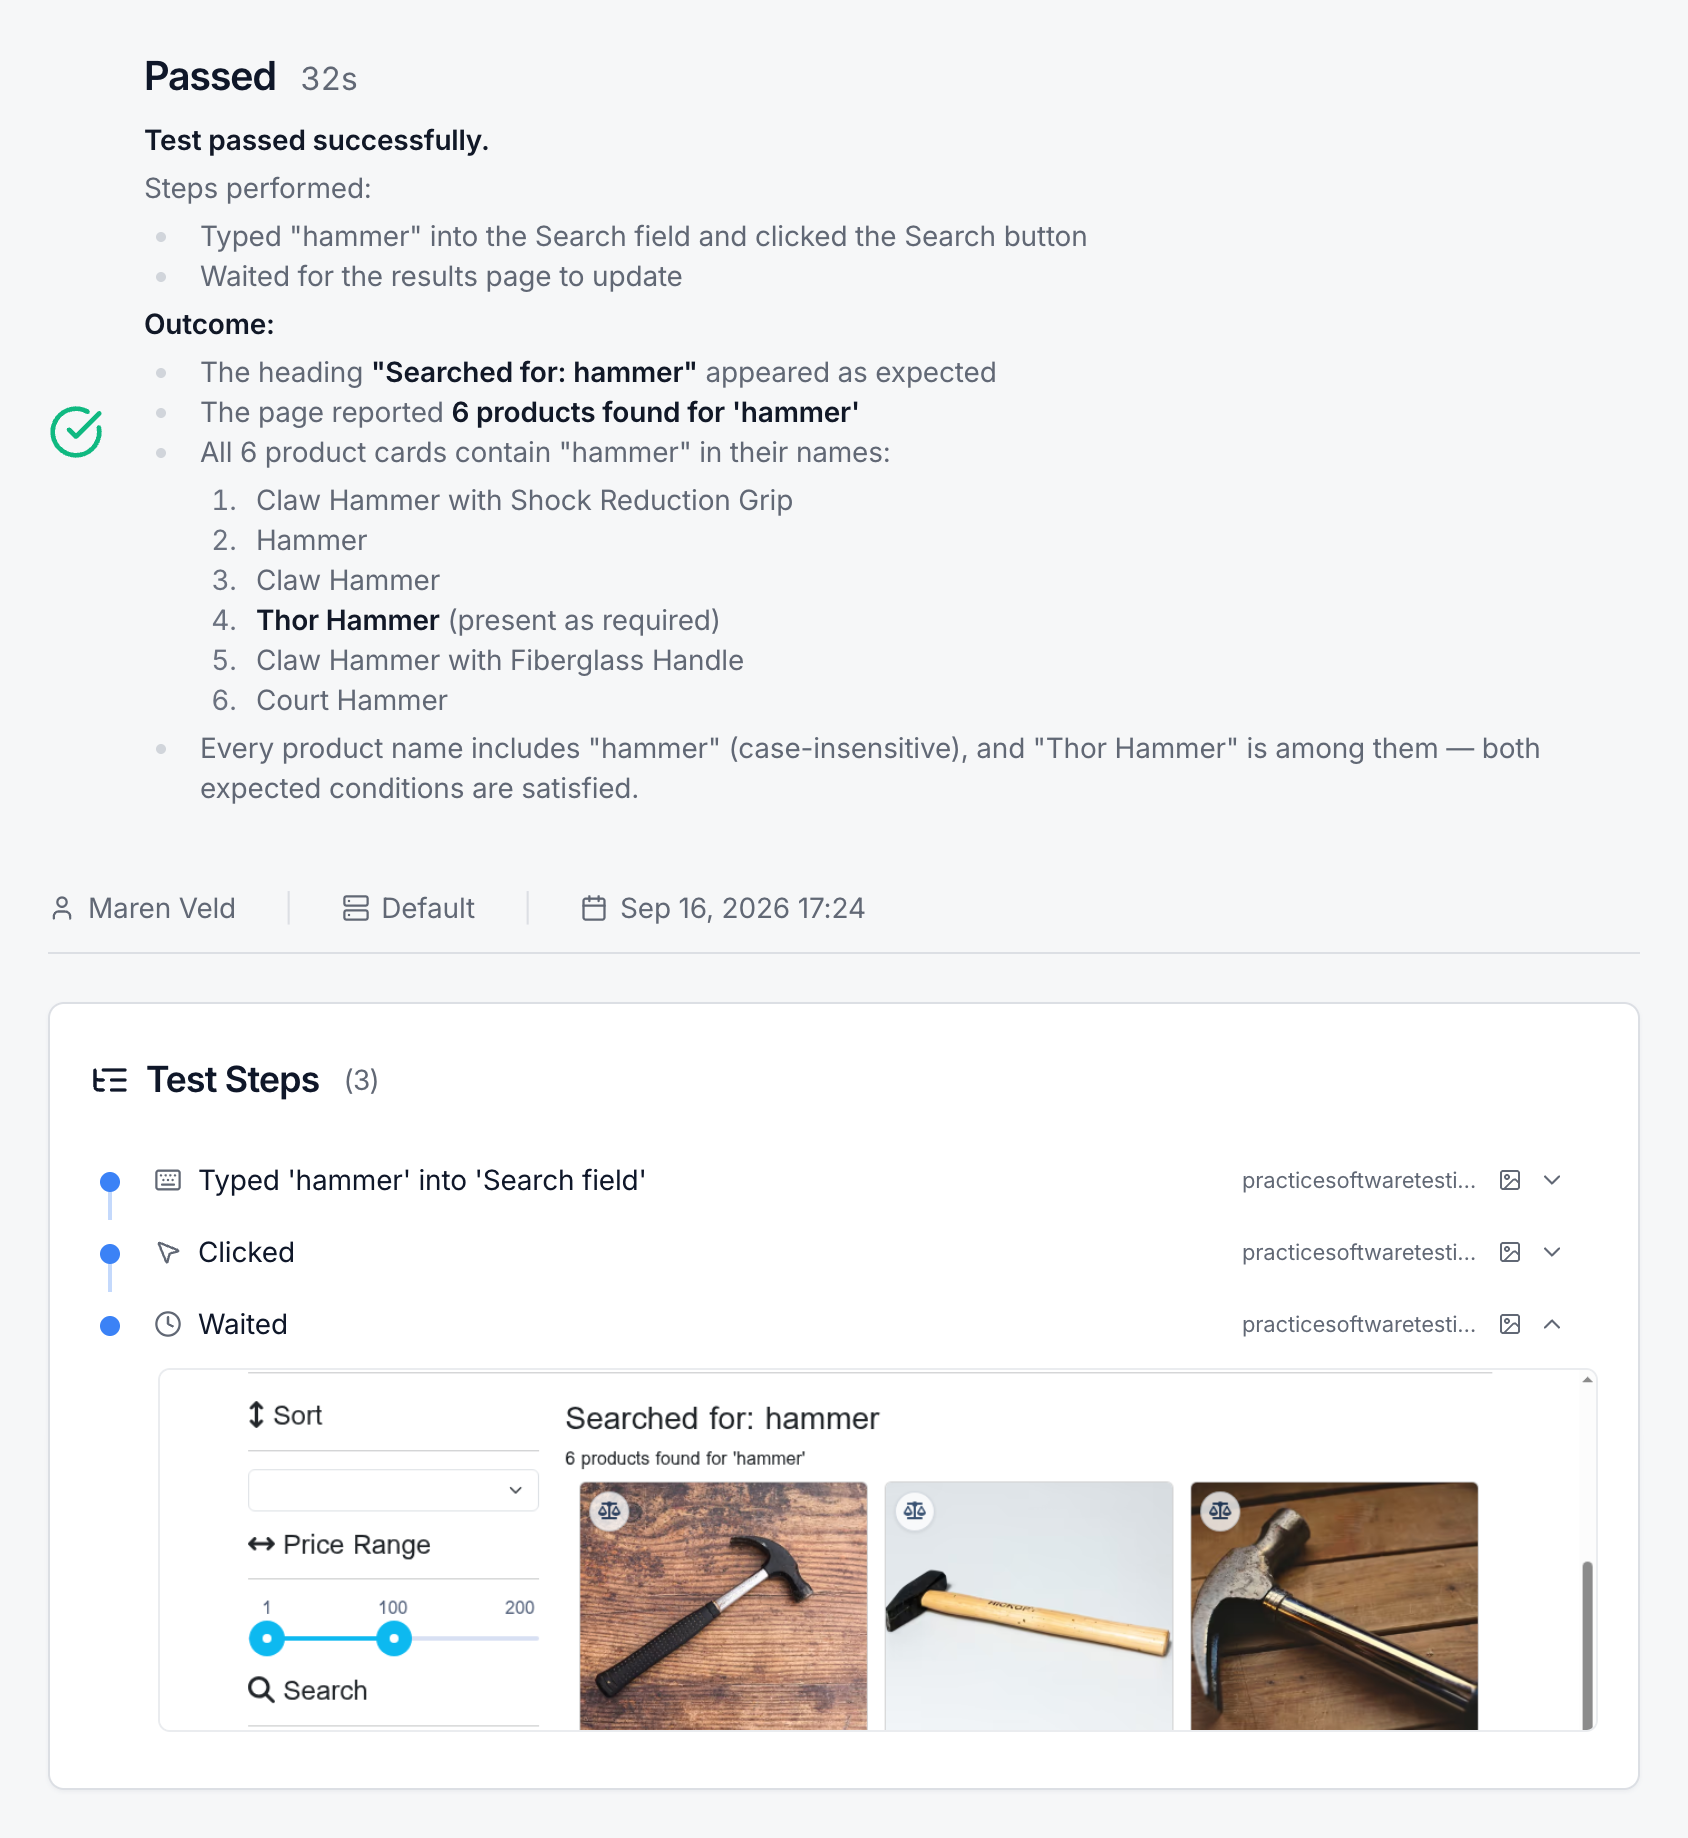
If your test shows PASSED, you’re done: Testmode searched the shop and confirmed that the results match your Expected Outcome.
What if my test failed?
Section titled “What if my test failed?”A failed test shows a Failure reason that explains what didn’t match. Read it next to the screenshots in Test Steps, then change the test and run it again.
Common causes on a first test:
- A label doesn’t match the site. Quote buttons, fields and headings exactly as the page shows them.
- The Expected Outcome is stricter than you meant. Describe only what must be true, in words the page actually shows.
- The site blocked the cloud browser. If the screenshots show an error or a challenge page instead of the shop, the site is refusing automated traffic. Test an environment that allows it.
- The reason starts with “Stopped early:” or “Timed out:”. The agent stopped making progress, or the test ran out of time. Check that your steps match the labels and flow the page shows now.
- The reason starts with “Login failed”. That only happens when a test uses a login credential. The quickstart test doesn’t use one.
The rows in Test Steps are the agent’s own actions, not a line-by-line copy of your steps. Testmode judges the whole test against the Expected Outcome, so read the summary first.
Next steps
Section titled “Next steps” testmode
Better software quality. No manual testing. Your team knows the software. Testmode does the testing.