The map of your app
The map is what Testmode knows about your app: every screen an exploration read, the links between them, the journeys users take ranked by importance with the tests that cover them, a product summary and your team’s notes. Read it, rank journeys and correct it.
The map is Testmode’s memory of your app. Every exploration adds to it and reads it before deciding what to test, and every review and investigation reads it too. It holds:
- Screens: every kind of page an exploration read, with a screenshot of how it last looked, what it is for, its forms and actions, and the links to and from it. Pages that differ only by an id, such as
/orders/1042and/orders/1043, are one screen,/orders/:id. - Journeys: the routes users take through the app, such as “Find a product by search” or “Check out”, ranked by importance, with the test cases that cover each.
- The product: a short summary of what the app is and who it is for.
- What it knows: notes your team taught it, and the answers to its questions.
Open it with Map in the sidebar’s Self-driving section, or press G then M. Every member can read it.
The Map tab
Section titled “The Map tab”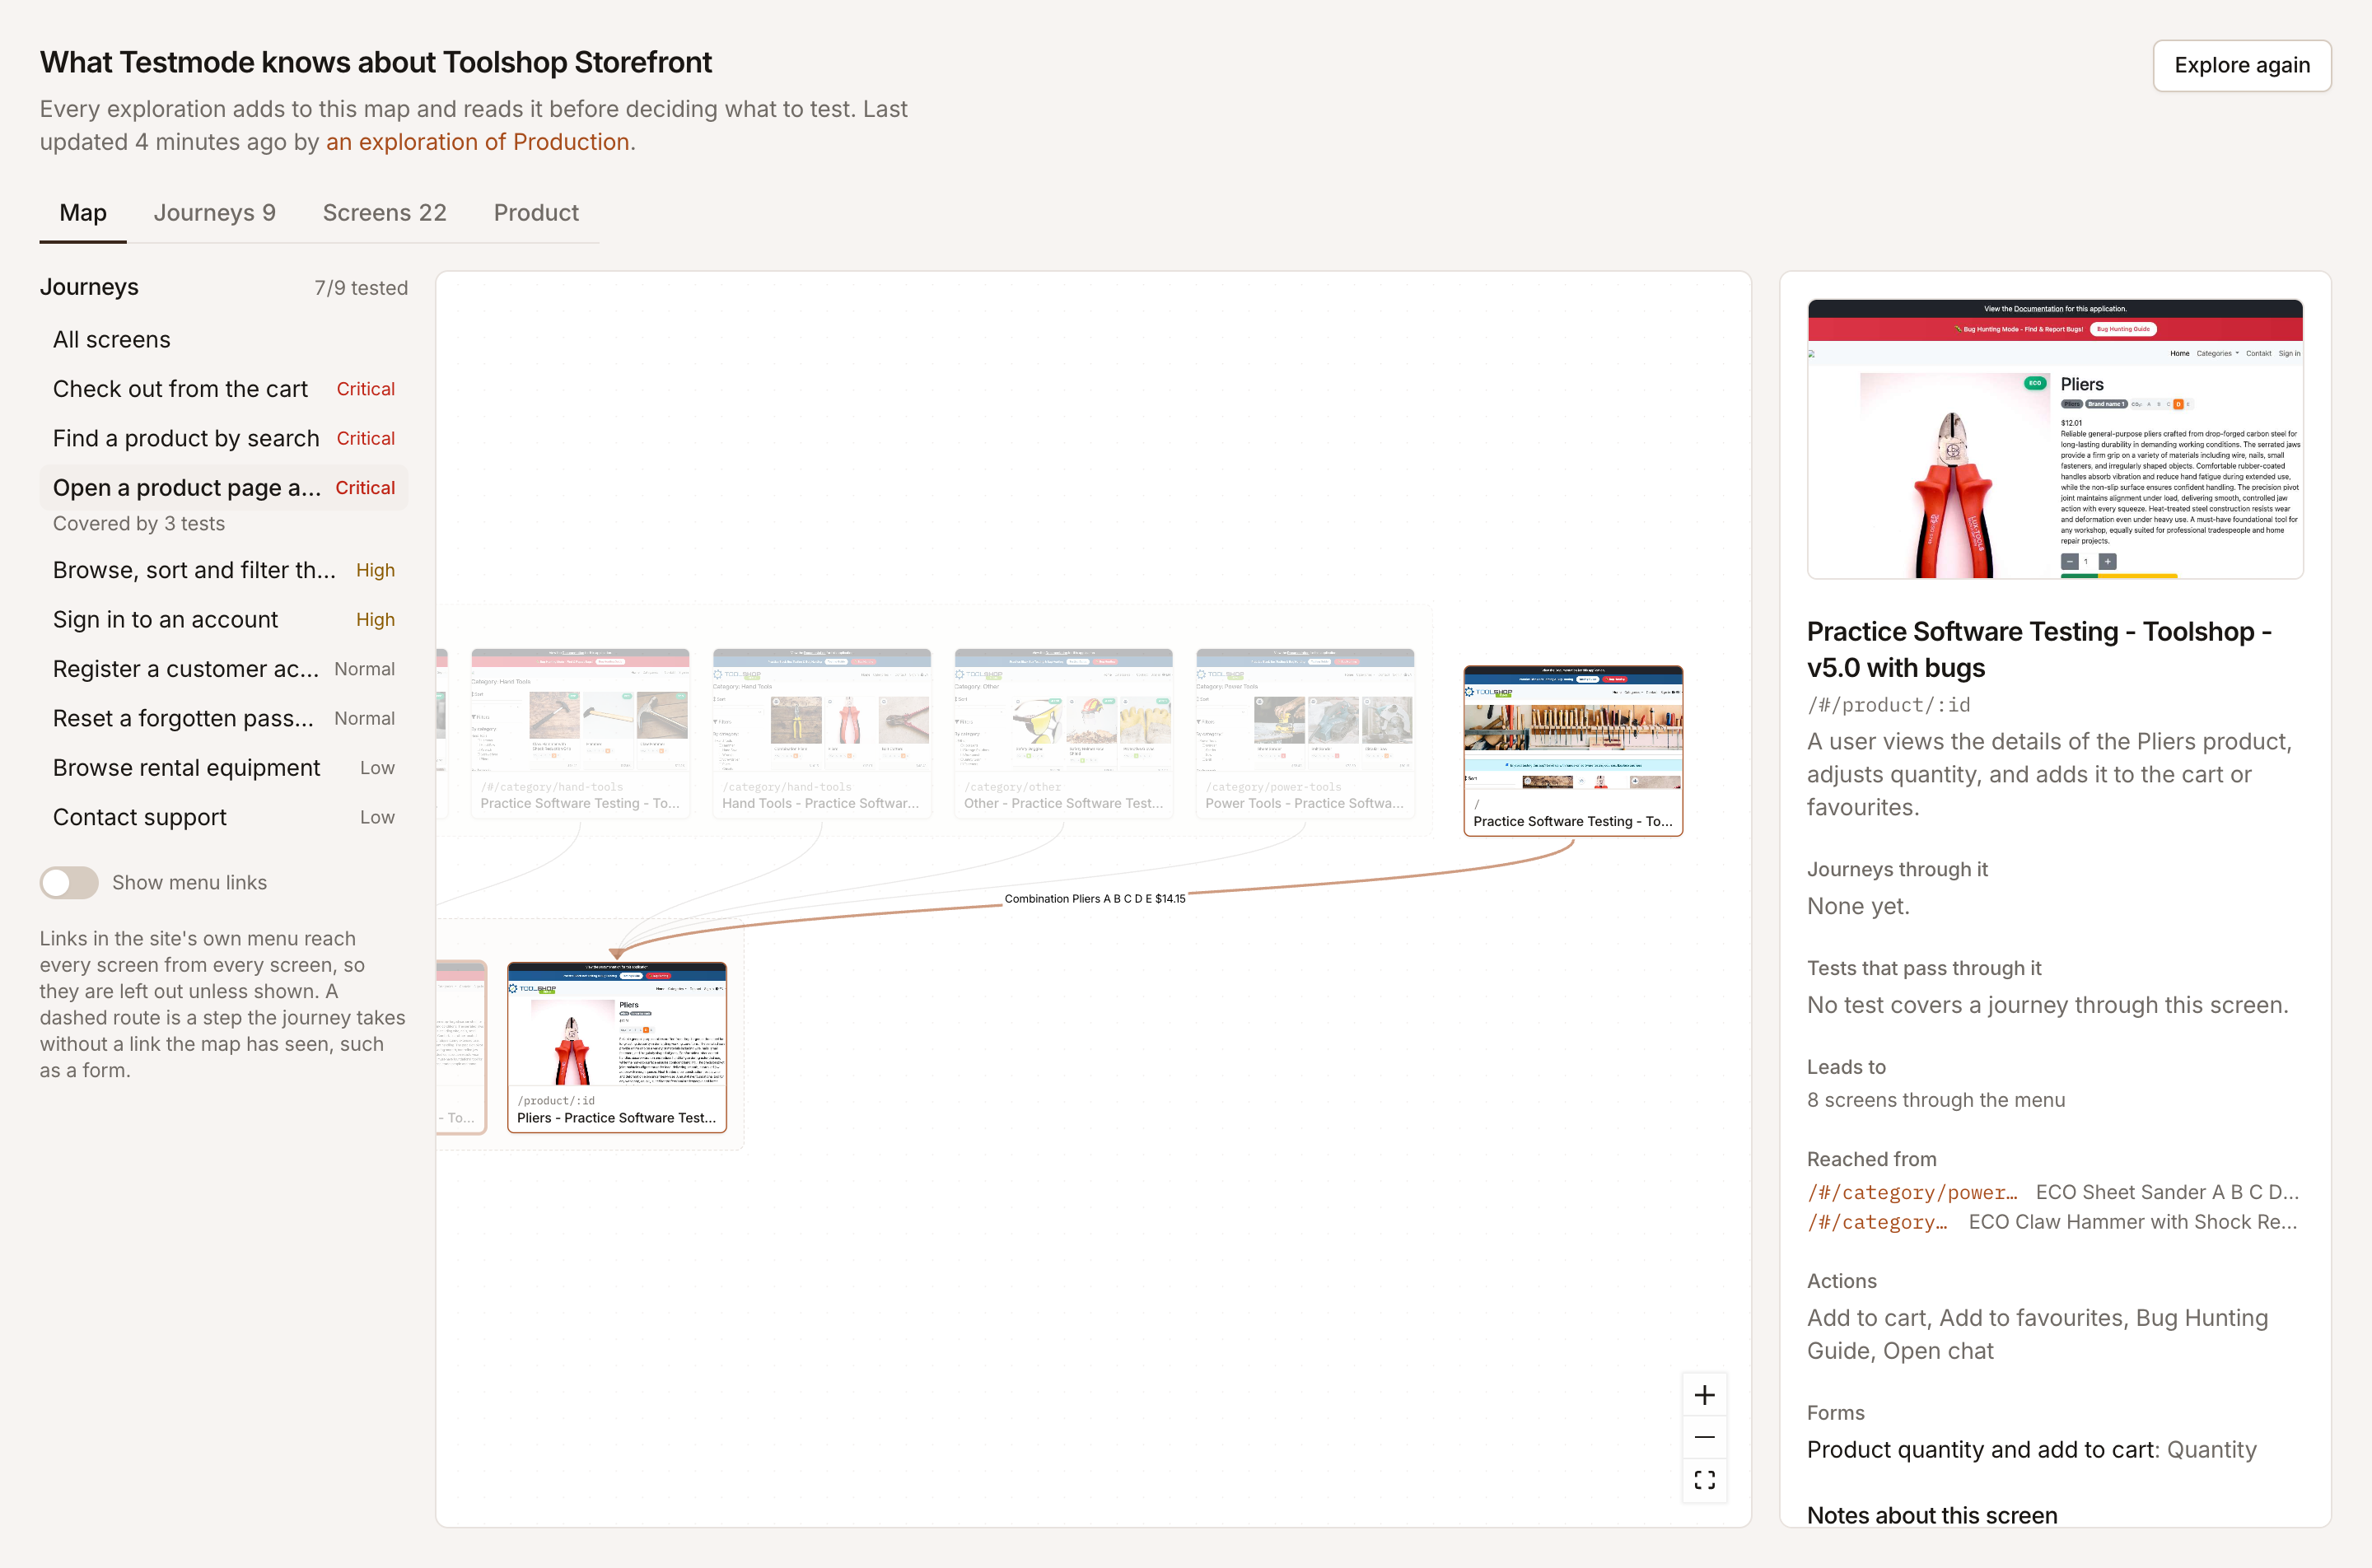
The Map tab draws the app as a graph: screens boxed by area, and the links in each page’s content as roads between them. Links in the site’s own menu reach every screen from every screen, so they are left out unless you switch on Show menu links.
On the left, the journeys are listed most important first, with how many are tested (for example 3/6 tested). Pick one to draw it as a route; a dashed part is a step the journey takes without a link the map has seen, such as submitting a form. All screens shows the whole map again.
Click a screen to see:
- how it looked, with the screenshot (click it to see it larger);
- Journeys through it and Tests that pass through it;
- Leads to and Reached from, the screens it links to and from;
- its Actions, Forms and any Errors shown;
- Notes about this screen, which every exploration and agent reads with it;
- Open the page, to open it in a new tab.
Journeys
Section titled “Journeys”The Journeys tab lists every journey with its importance, its steps (the screens it passes through) and the test cases that cover it.
| Importance | Meaning |
|---|---|
| Critical | The business stops or loses money if it breaks |
| High | A core feature most users rely on |
| Normal | Worth covering when it is cheap |
| Low | Rarely used or cosmetic |
Self-driving ranks journeys by your project’s goal. Change a journey’s importance to rank it yourself: later explorations and reviews keep your ranking.
Editors can delete a journey that is wrong from its menu.
Screens
Section titled “Screens”The Screens tab shows every screen as a card with its screenshot, its path and what it is for. Click one for its details. Remove from the map removes a screen that is wrong; an exploration that reads it again puts it back.
Product and what it knows
Section titled “Product and what it knows”The Product tab shows the summary of the product and What it knows: facts your team taught Self-driving and the answers to its questions. Every exploration, review and investigation reads them first. Add a note when Self-driving gets something wrong, for example “Checkout uses a test card” or “Reports are only for admins”, and edit or delete notes from their menu. Notes about one screen are added on that screen, and show which screen they are about.
Notes don’t belong to a person: everyone in the project sees them, and Editors and above add, change and delete them. Don’t put passwords in a note; add a test login under Settings > Credentials instead.
Keep it current
Section titled “Keep it current”The map changes as explorations read the app: a screen read again gets a new screenshot and drops links it no longer has. Explore again opens the new exploration panel, to bring it up to date now. With Self-driving on, it explores on its own every day. See Turn on Self-driving.